Disclosure: Privacy Australia is community-supported. We may earn a commission when you buy a VPN through one of our links. Learn more.
Windows Privacy Settings

By
Will Ellis
-

-

-

Last Updated on January 2, 2024
You might not be aware of it, but roughly 75% of all desktops run Windows 10. That’s a staggering number, with some figures putting that anywhere between 1.8 to 2 billion devices that Windows is installed in.
The big issue is that most desktops not only come with Windows 10 pre-installed but oftentimes people don’t bother to deal with the privacy settings and just go with default options.
It is worth acknowledging concerns regarding Microsoft’s approach towards data collection, as default settings on Windows 10 can be perceived as invasive in terms of security and privacy.
Fortunately, there are ways to mitigate a significant portion of these concerns by adjusting the privacy settings within Windows 10. By making specific changes, users can enhance their privacy and security on the platform. It is recommended to explore and modify the settings according to individual preferences in order to address any privacy-related issues within Windows 10.
Limit Cortana
We get it: virtual assistants are great and they can generally make life much easier. Unfortunately, Cortana, and truthfully the other virtual assistants like Siri and Google
Assistant, only function by sending your requests to the cloud for processing. This means that any task you ask these assistants to do will be logged by their respective companies.
Now, this may not be such a big issue on mobile devices, but when it comes to Windows, the amount of data that Cortana can track is truly shocking.
In fact, there’s a lot of privacy advocacy that goes on around dealing with Cortana and how a lot of people would prefer to not have her there.
The problem is of course that Microsoft wants you to use Cortana, so while back a few years ago you could just switch Cortana off, that’s no longer an option. Instead, you just have to do damage control and limit the amount of info she can collect.
As of right now, this means searching for ‘Cortana’ in the search, and click on ‘App Settings’. Once in there you want to turn all permissions off. Sadly, there used to be a lot more control over Cortana but Microsoft removed that.
Turn Off Location Tracking
This one might seem like a weird one, especially if you have a desktop device that stays on one place, but the truth is that with location tracking, any connected app to that account can track your location.
Even worse, if you use a laptop device with Windows 10, then every place you go to will be tracked.
Now, this may not seem that bad, but the truth is that it’s a pretty big invasion of privacy, and it’s not really worth the benefits you get out of it.
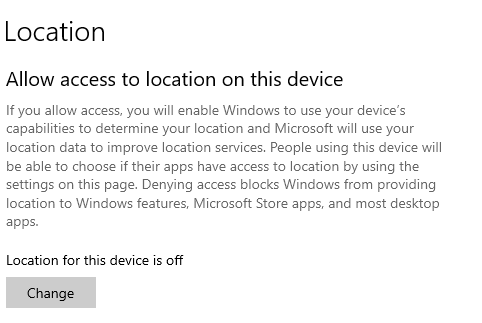
To turn location tracking off, simply search for ‘location privacy settings’, which should open up a new window. In here, you’ll want to switch everything off. Alternatively, if you want some location tracking functionality, you can allow it on an app-by-app basis.
Control Camera Access
This one is a bit more insidious and has generally become a wide fear among many. You’ll often find people covering up the front-facing cameras of their phones, and even sometimes the back cameras as well.
When it comes to desktop camera access the issue is even bigger because they tend to be directly facing the whole room and therefore have a big vantage point.
Therefore, disabling the camera altogether can help alleviate any fears or paranoia that somebody has hacked your computer and is watching you through your webcam.
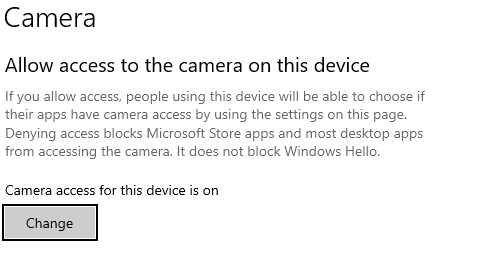
The process for switching off camera access is similar to the location tracking one. Simply search for ‘camera privacy settings’ and click on it, which will take you to a new window.
Similar to location tracking, you can switch it off on an app-by-app basis, or you can switch the whole thing off altogether.
Personally, we suggest the latter and only switching it back on as needed, and if you still don’t truly trust it, you can always get yourself a webcam cover.
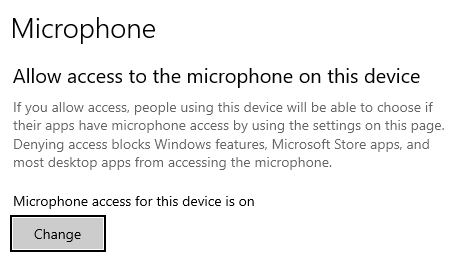
Turn Off Microphone Access
Ok, we know we’re basically hitting the same audio-visual privacy issues a third time in a row, but microphones can also be a cause for concern when it comes to privacy, much like the previous two issues.
Thankfully, again, the process for turning off microphone access is simple. Search for ‘microphone privacy settings’ and click on it to bring up the window.
Now, with this one, we generally suggest doing it on an app-by-app basis, especially since voice comms have become pretty standard this day, whether it’s for digital meetings or gamings.
There’s nothing worse than forgetting than setting ALL access off, forgetting about it, then trying to spend 15 minutes figuring it out. Therefore, just switch off access for any apps you don’t use voice communications with.
Turn Off Activity History
While the previous three entries can arguably be acceptable in certain circumstances, we feel like this one is not the case at all. So why is this such an unacceptable breach of privacy? Because it tracks literally all your activity.
We’re not just talking about browsing history either, we’re talking about how you browse files and what apps you use, even when you use them. Essentially, Windows 10 is trying to create a psychological profile of how you use computers.
It’s pretty insidious if we’re being honest and you should put a stop to that immediately.
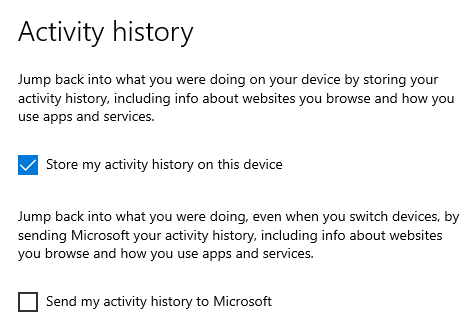
So how do you stop it? Well, in the search bar type ‘Activity History privacy settings’ and click on it. The new window that pops up will have two checkboxes and you’ll want to make sure that they’re both unticked.
On top of that, you’ll likely want to press the button at the bottom called ‘clear’ so you can clear any history that’s been accumulated so far before you’ve had a chance to switch it off.
Turn Off Advertising ID
Ads are the bane of our existence, and the fact that companies collect as much information from us as they can to deliver targeted ads is annoying. Unfortunately, Microsoft is on this bandwagon, and Windows 10 tracks your interests and whatnot and generates an ‘Advertising ID’.
This ID is basically like the profile above, except more specific to what advertisers might find interesting. In fact, this advertising ID can be shared with advertisers to directly deliver targeted ads, even within windows itself, which is exceedingly irritating.
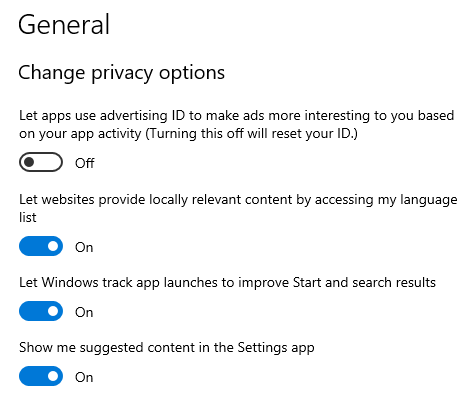
Thankfully, you can actually turn this ‘feature’ off. Simply type in “Choose if apps can use your Advertising ID” and click on it to open a new window. You’ll want to toggle off all the options you find on that page, which will help slow down the information collection that advertisers do.
That being said, it doesn’t stop all tracking, and we generally suggest also getting a good secure browser like Brave which has built-in ad and cookie blocking.
Change Access To Your Contacts
Going back to some more basic stuff here, you might want to consider restricting app access to your contacts. Beyond just collecting information on your contacts themselves, a potential app could spam them with messages.
Even worse, a malicious program could send them phishing links or links that will automatically download malware to their devices.
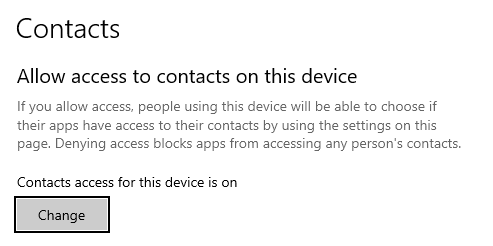
Thankfully, switching access to them off is easy, just type in the windows search ‘Contacts privacy settings’ and click on it to send you to a new window. Much like the webcam and webcam settings, you can choose to switch off access on an app-by-app basis.
It might be useful to go that route if you use the windows email/mail client or the Xbox.
Limit the Lock Screen
For being so simple, the lock screen actually can provide a ton of information for somebody without them needing to do much. As an example, I’m sure we’ve all experienced the embarrassment of a personal notification appearing on the phone as you’re showing something to family.
These notifications, and other things, can give out a lot of information you don’t want to, as such, you’ll need to turn off a couple of things:
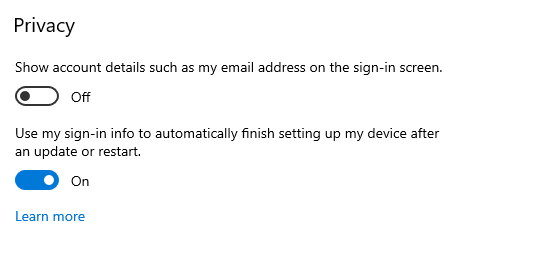
First of all, type in the search ‘Sign-in Options’ and click through to the next window. Here you’ll want to scroll all the way to the bottom and toggle off “Show account details such as my email address on the sign-in screen”. You won’t miss out on any features by doing this, so there’s no downside here.
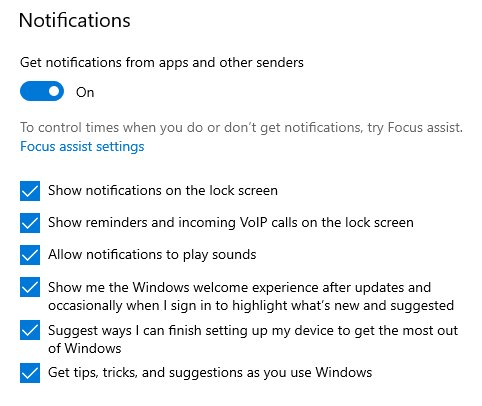
Then, type ‘Notifications & actions settings’ in the search and click on it. In the new window, you’ll want to uncheck “Show notifications on the lock screen”, it will be the first uncheckable option.
You should also consider unchecking “Show reminders and incoming VoIP calls on the lock screen”. That one is more situational and up to you.
Use a Local Account
Probably one of the best things you can do is just to use a local account. If you don’t have your information or anything synced up to other devices, or if you’re following good privacy practices, there’s no need to log in with an email.
This isn’t an option that is readily apparent, but you can absolutely choose to have a local login instead which requires no email. Luckily, you can still do this even if you chose to sign in with an email when setting up your account.
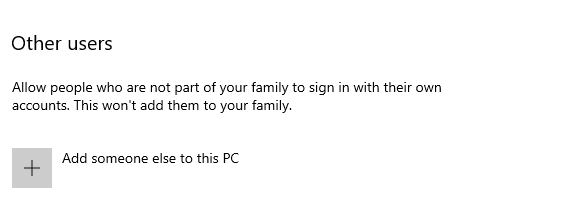
Simply type “Your account info” in the windows search and click on it to open the settings page. There, you will see a link that says “Sign in with a local account instead”. Just click on that and follow the instructions and you’re done!
You May Also Like: