Disclosure: Privacy Australia is community-supported. We may earn a commission when you buy a VPN through one of our links. Learn more.
How to Erase a Hard Drive or an SSD

By
Will Ellis
-

-

-

Last Updated on January 1, 2024
With all the hubbub surrounding data protection and privacy on the Internet, it’s easy to forget that there’s also a significant danger in leaving your data on your computer’s hard drive.
We live in an era where almost everyone has a laptop.
The potential problems you might experience if your computer is stolen and your hard drive is skimmed can’t be understated.
Of course, most people regularly “delete” their sensitive information, especially when they trade their computer and for anyone and try to participate in recycling programs… or do they?
Can I Simply Erase the Data?
Deleting files from physical storage is not as simple as deleting your Google history.
The truth is that most typical data deletion methods aren’t actually good enough to permanently erase your data from your hard drive. This allows anyone with the right tools or skills to recover your data, including your passwords or possible financial or credit card information.
The danger of leaving your data available for theft is very real. Identity theft affects hundreds of thousands or millions of people every year in all major countries, particularly in one’s where theft of public property is also correspondingly high.
Many identity thieves get the information needed to breach your bank account or rack up thousands of dollars in credit card debt from personal information on your computer.
Even worse, many people accidentally leave sensitive personal or business data on their laptops. This data – ranging from lewd pictures to the reports for your business’s next fiscal quarter – can be leaked to the wrong people relatively easily. In short, there are lots of reasons why you need to prevent your data from falling into the wrong hands.
But there’s a big difference between conventional deletion and proper deletion. Today, let’s look at how to actually erase a hard drive or solid state drive in ways that’ll ensure your data can’t be recovered by thieves.
Why Regular Deletion Methods Don’t Cut It

For most people, deleting their sensitive data is as simple as moving the folders or files you want gone into your Trash or Recycle Bin.
But this doesn’t do the trick at all, and it does nothing to erase any sensitive information on your hard drive.
Things like your Social Security number or any other personal information that may be saved through browser fingerprinting or some other security breach at some point might be still hiding deep within the nooks and crannies of your data drive.
When you delete a regular file on a conventional hard disk drive, or HDD, it’s sent to the Recycle Bin directory.
This is a default deletion feature enabled in every version of the Windows operating system.
This feature is useful for many since it lets you recover any deleted files or folders if they were removed by accident. Most people think that “permanently deleting” files in the Recycle Bin gets rid of them for good.
But the truth is that nothing at all happens… at least, not yet. Instead, your computer now marks that data as “free”, meaning it can be overwritten by new data placed into your computer’s hard drive. This doesn’t immediately delete the data in question, although it allows it to be erased-through-overwriting over time.
Naturally, this means certain recovery tools and still recover data you’ve deleted through the Recycle Bin.
SSDs Work Differently
It’s a little different if you use a solid-state drive or SSD. Solid-state drives constantly write and move written data according to different rulesets, meaning that every bit of physical memory in the drive is used proportionally and uniformly. In essence, this allows SSD’s to last for much longer than standard hard drives and helps them store data more evenly.
However, this design makes it almost impossible to fully erased specific files on an SSD, ironically making these drives worse if you want to ensure that your data never gets into the wrong hands. It takes more specific and measured approaches to fully delete files or other data from your SSD, but we’ll go over exactly how to do so later in this guide.
How Do Data Recovery Tools Work?
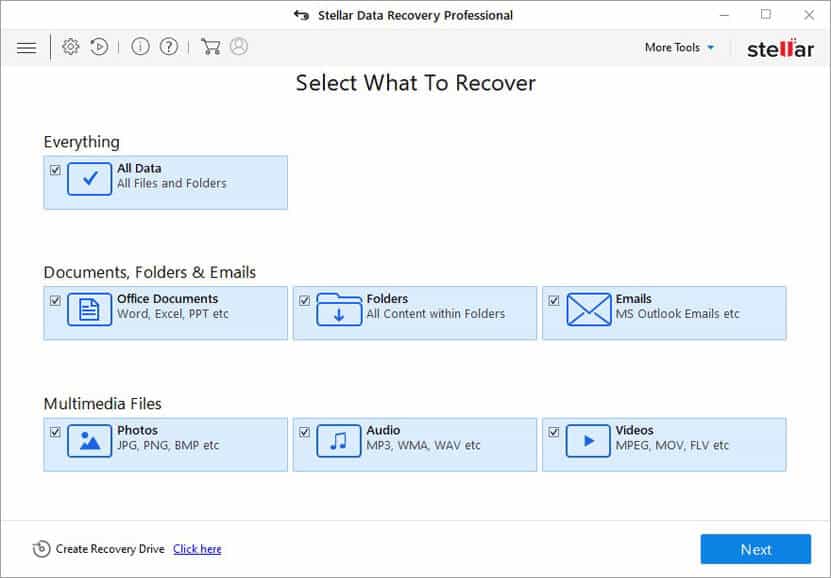
Whenever you use a standard deletion method like the Recycle Bin to “erase” your data, it can be easily retrieved from publicly available recovery tools. Three of the most common recovery tools are Steller Phoenix, Alsoft DiskWarrior for Macs, and Kroll Ontrack EasyRecovery.
In Steller Phoenix’s case, the program dives deep into your memory media for any hidden files and checks for file signatures, even if your storage media is corrupt or extremely cluttered. In certain cases, even raw data is recoverable, meaning that even some files that have been largely overwritten by new data storage needs might still be partially recoverable.
Alsoft DiskWarrior isn’t a direct recovery tool but is instead used to rebuild damaged hard disks by fixing up the directory using data recovered from the original directory system. In a nutshell, this recovers files and folders that were previously deleted or lost, allowing any would-be scavenger to reconstruct the shape or contents of your hard drive after the fact.
Meanwhile, Ontrack EasyRecovery searches for files that have been deleted from the command line or removed from the Recycle Bin. It can even recover formatted or lost hard drives and any hard drive logical but digital system damage; in other words, it works very well on a hard drive that is in otherwise good physical condition.
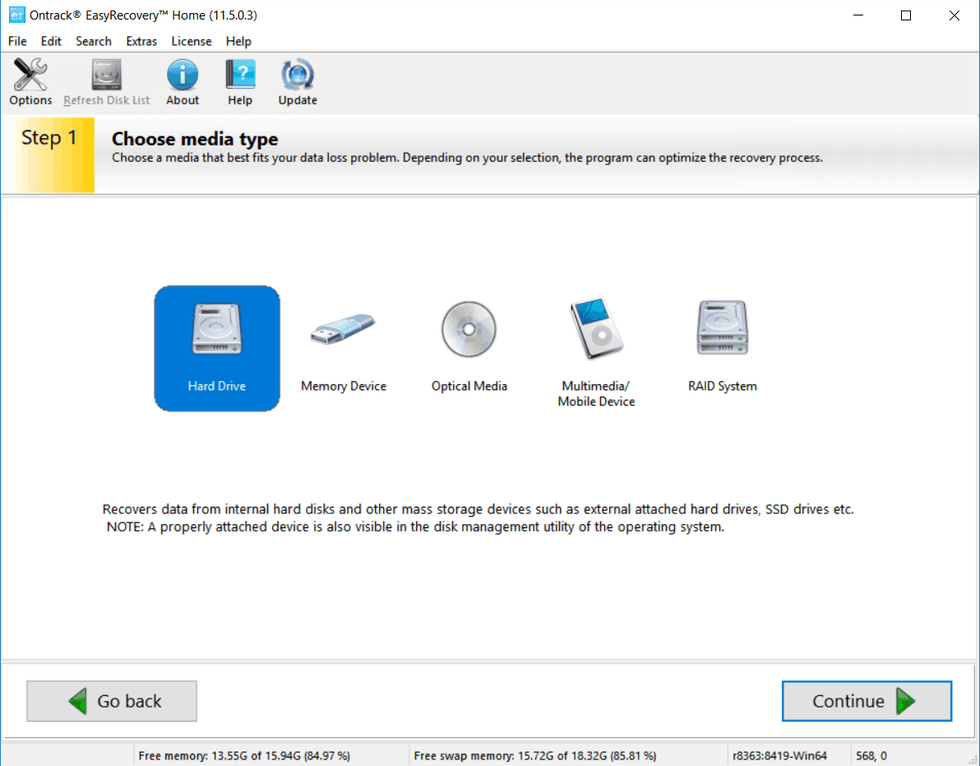
So if all you did to clear your hard drive was “wipe” everything in the Recycle Bin, EasyRecovery should be able to get most of it back.
Between each tool, the process is the same: the fact that deleting data doesn’t erase the physical bits of information but instead merely marks them for overwriting at some ethereal later date means that most data deleted is actually quite recoverable.
Even formatting is typically not enough to delete data permanently off your computer. Formatting is a feature allows you to “erase” data from your hard drive. Of particular importance is the “write-zero” function. This feature basically sanitizes the data on your hard drive and overwrites existing information to prepare it for rewriting.
To get a bit technical, fully formatting your drive makes every character on the disk a zero – remember that all data, when you get down to it, is sequences of ones and zeros.
However, data recovery tools can still find traces of files that exist on the hard drive beforehand and use these to reconstruct a memory of the original data.
In addition, this “zero pass” may actually overwrite existing hard drive information with characters other than zero, resulting in traces that can be picked up by recovery tools. You have to use even more foolproof methods to make sure that your data is really gone.
Safety Matters
There are safer and more dangerous ways of deleting your data, one of which you might prefer based on the risk that it offers to your personal life or business.
Using the Recycle Bin and simply deleting your data this way is the most “dangerous” method of data removal since it allows for retrieval in case you accidentally get rid of something you need. But this also allows your files to be easily recovered by a hacker or thief.
Conventional HDDs can also have their data physically overwritten. You can use specialized software that can overwrite any disk space freed up from your regular deletion methods with random data. Think of this as covering your tracks with fake ones, making it all the more difficult for recovery tools to find your old files.
This is a reliable way to ensure that the contents of files will be lost forever, even if hackers can see the original filename. These tools are effective because they fill the locations of old files with random zeros or other values.
Ultimately, you have to balance data safety with the knowledge that if you truly permanently delete your data you won’t be able to recover it. Make sure, as with all things, that you’re certain about your decision before settling on a deletion method. Above all, know that just sending files to the Recycle Bin is far from safe, even if it’s quite easy.
How to Erase a HDD/SSD… Forever
While the risk of data recovery exists, there are several methods available for data deletion that can be relied upon. However, the effectiveness of these methods and their suitability for your specific requirements depend on whether you are using a Hard Disk Drive or a Solid State Drive.
The Difference Between an HDD and SSD
In brief, hard disk drives are the more well-known and tested of the two drive varieties.
They’ve been around for more than 50 years and rely on spinning discs called platters to read and rewrite data. In a nutshell, HDDs have one or more magnetically sensitive platters along with actuator arms that have specialized reading or writing heads for each.
Hard Disk Drives
The platters are organized into concentric circles called tracks. These are then divided into sectors, which have several unique addresses that can be used to locate and organize data. Platters can spin at different speeds to allow for faster or slower reading and writing of data.
Overall, HDDs are much more mechanical than their SSD counterparts. HDDs are beneficial since they are very well-proven devices, are less expensive, and usually come with more storage space overall than SSDs.
Solid State Drives
Solid-state drives use flash memory for extra performance and increased durability. Basically, SSDs are larger USB drives that use the same basic technology.
Floating gate transistors record charges to store data; all the gates are organized into grid patterns, which are then further organized into blocks. This requires that all the data in a block be refreshed whenever something is updated, which allows for better organization and more efficient use of available memory space.
This manifests in faster loading speeds in most scenarios. However, it requires that SSDs always have a little extra storage space that can’t be accessed by the user or used for data writing or reading; it needs the extra room to move things around fluidly. SSDs are beneficial since they are proportionately much faster compared to HDDs, as well as being lighter and using less energy.
The Software Approach for HDDs
For HDDs, your software deletion method will depend on your operating system.
For Windows, the simplest software deletion solution is to use a dedicated software eraser program. However, although this method is relatively quick and cheap, it doesn’t work very well on defective files or if your HDD is physically damaged.
One of the best example programs is Darik’s Boot and Nuke, or DBAN.
It’s a free piece of software and does a decent job of wiping your hard drive, although it requires the creation of a wipe CD or DVD.
Hook up the drives you want to be wiped to a PC and boot up the program. However, you need to be very careful when using programs like this, as you can accidentally delete the wrong data drive – like the primary drive of your main computer!
DBAN: The Best Data Deletion Software

How to Use DBAN:
- Download the program at the website link, marked above
- Save the file to your computer and burn the program to a CD or the ISO file to a USB drive
- Insert the CD or USB drive into the computer attached to the hard drives you want to delete
- Restart your computer
- The CD or USB should launch DBAN automatically, providing a main menu upon boot up
- You can then choose a main option from this menu. Pressing F3 will provide you with a list of quick commands to help you more easily navigate the program
- The “dodshort” command is recommended
- Press F1 to continue
- You’ll then be prompted to select the hard drive you want to erase; double-check before inserting the CD or USB at the beginning of this process that you know what the drive is called, as there is no going back after this point
- Press F10 to start the deletion process
- Eventually, you’ll see a success message pop up on the screen, which will then be followed by a prompt to restart your computer. Remember to remove the CD or USB drive to prevent DBAN from booting up again when your computer restarts
This software is just one example of other data deletion tools available online. DBAN is arguably the best around for most needs, however, and most of the tools follow a pretty similar process.
Eraser
Eraser is a free and open-source tool that helps you erase sensitive data from Windows hard drives. Like DBAN, it does a great job of wiping your hard drive by using various selected patterns to make sure that it covers all the available sectors.
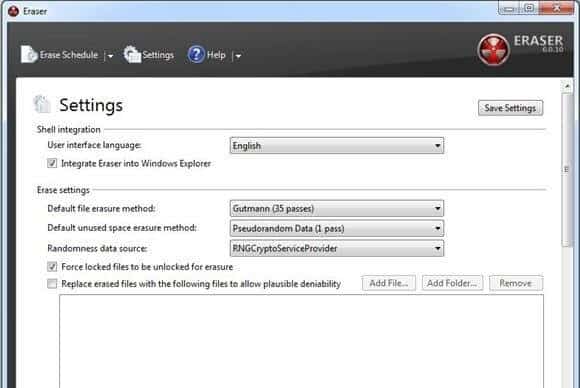
There are a few advanced tools that allow you to select different files or erasure methods, making it slightly more precise or selective than DBAN. Even better, you can schedule regular erasures of your files, which might be helpful if you use a relatively public computer.
Active KillDisk
This powerful tool supercharges the “write-zero” data deletion method, performing a much higher number of passes to ensure that data is deleted much more effectively. It includes several additional options to let you customize your drive overwriting.
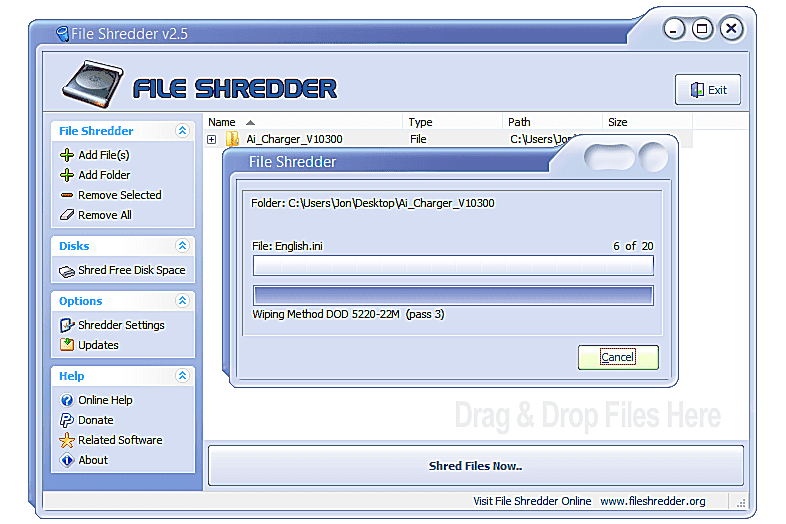
FileShredder
FileShredder has been around since 2007 and is its own fantastic tool. It’s extremely powerful and free for everyone to use, relying on five clever algorithms to completely overwrite your hard drive disk. The software package is also only 2.3 MB in size, making it one of the easiest to install, even on crowded computers.
While you can use the above tools with macOS as well, you actually have an additional option because hard drive formatting is more secure for Apple devices. Let’s go over how to erase your data from a Mac computer.
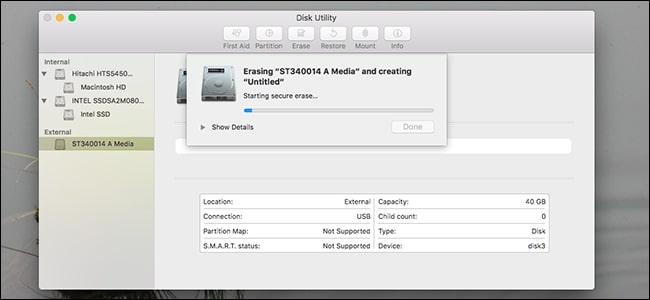
Mac Erasure
- Shut down your Mac computer completely
- Restart the device by holding the R and CMD buttons simultaneously after pressing the power button
- A selection menu will pop up, at which point you should click the “disk utility” button
- Unfold the main disk drop-down menu and double-click the correct hard drive you want to delete. Like with the other methods, make sure you know the hard drive you are deleting for sure
- Go to the top of the screen and find and click the erase button
- This will cause a prompt where you must choose a name, partition map, and formatting method. You can click on the security options button to choose said formatting method
- On this screen, drag the corresponding slider all the way to the right. This will help make sure that your erasure procedure uses the most secure formatting method
- This causes the drive to pass over seven times to overwrite all available data, making it incredibly hard to restore
- Press the erase button one more time and you’re all set!
Software Approach for SSDs
SSD drive erasure requires slightly different procedures because of their different construction. In general, secure data erasure for an SSD can be accomplished either through SSD management or manufacturer software or BIOS.
BIOS
BIOS is best understood as a special type of firmware used to initialize your hardware as your computer boots up. This comes preinstalled on your computer board, and if the first software to run upon system startup.
Many BIOS firmware has its own secure erasure feature, though you’ll need to double-check your motherboard features to find out whether this applies to your computer. The MSI Gaming AMD Ryzen X370 Motherboard is a great example of a motherboard that includes this feature.
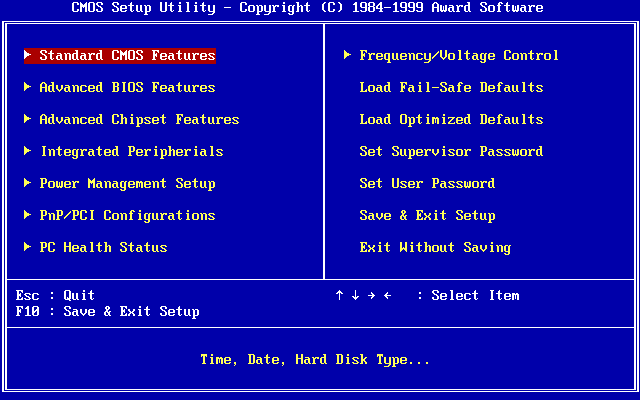
To access your BIOS secure erasure feature:
- Restart your computer and boot into your BIOS: this is generally accomplished by striking the delete key during the startup process
- Find the setting for secure erase; it should be relatively easy to find
- On-screen instructions should direct you to the right buttons or procedures. The exact specifications can vary, but it’s never too complex
- Generally, BIOS directs you to select which of your hard drives you want to erase, along with offering a prompt confirming your decision to wipe the drive
- After drive wiping, the prompt will declare its success and reboot
Other SSD Erasure Techniques
An easy way to erase your SSD to use the manufacturer utility. Depending on who constructed your SSD, finding such a utility may be quite easy.
For instance, Intel Solid State, Corsair, SanDisk, Samsung Magician, and OCZ Toolbox all have easy to find links in which you can download these utilities.
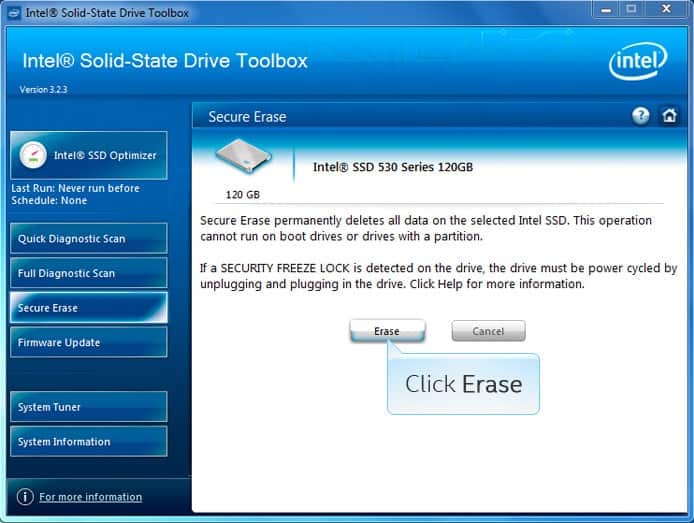
Running these utilities will allow you to wipe your SSD quickly and painlessly. Regardless of your drive type, you should always read the manufacturer guidelines before deciding on any other SSD erasure method.
The above choices are manufacturer dependent so you’ll need to find a different utility if you use a different manufacturer or rely on an alternative method if your manufacturer doesn’t provide a utility at all.
You can alternatively use a third-party deletion software for your SSD. One of the most effective is Parted Magic. It’s not free, but fairly effective and not too difficult to use, especially when there are tutorials available online.
Secure Erase Pass
There’s also an excellent tool that works for both HDDs and SSDs. Performing a Secure Erase Pass is particularly effective compared to the “write-zero” function offered from drive formatting tools.
It provides a command to delete data on the hard drive that originates within the hard drive itself; this makes it less likely that the drive rewriting deletion function won’t miss any sections by accident. Without getting too technical, the delete command coming from within the drive itself overrides the security function that sometimes prevents deletions from affecting all sectors.
In addition, Secure Erase Pass is very fast compared to many other data wiping methods. Its only disadvantage comes from the fact that it’s only useful if you want to totally erase your drive. It doesn’t allow for targeted deletion, meaning it’s best as a truly nuclear option rather than a surgical tool to get rid of sensitive information selectively.
Getting Down and Dirty
Finally, you can ensure the erasure of your data by destroying your drive with brute force. Of course, this method is only really applicable if you are comfortable with getting rid of your drive entirely and don’t need any data to be salvaged ever.
However, the satisfaction and security you’ll get from totally destroying your drive physically make it a good choice if you want to send your drive to a recycling plant and prevent your data from being compromised.

Magnets are one super effective solution. Using a magnet on your drive (by wiping magnets across the surface) scrambled the magnetic signals that the data is written with. Like magic, you can use a magnet to jumble the magnetic fields on a hard drive and turn the data into scrambled eggs.
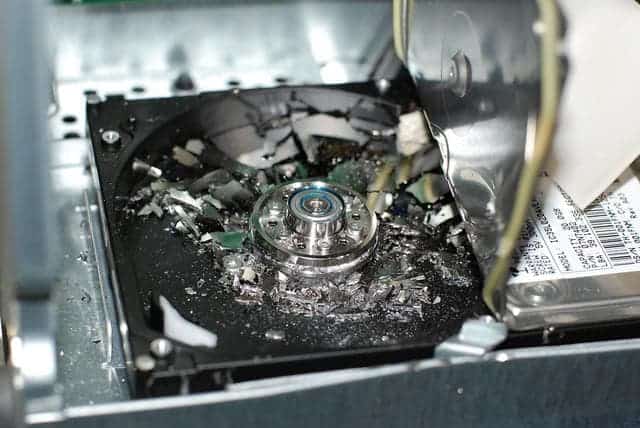
Alternatively, you can use a physical hammer and destroy all the glass platters on a hard drive. A few blows should do the trick, although you want to make sure that you wear safety goggles and gloves. After all, shattering a hard drive is likely to create some pretty fast-moving debris!
Or you can use a screwdriver. This is a little less violent and dangerous, but it requires that you take the drive apart piece by piece. Standard screwdrivers will likely work, but try to find something that matches up with the screws of your hard drive.
You can physically take apart all the miniature pieces of your hard drive and throw them away separately, or even recycle them at different plants. There are few data deletion strategies more complete than this.
The Hardware Approach (Both HDD and SSD)
Hardware secure data deletion methods are usually more expensive than a software method, but they are also typically faster. Their speed and efficiency also allow you to wipe multiple drives relatively quickly.
Hardware tools also have an advantage in that they don’t require that you use a PC to perform a wiping operation.
The Wiebetech’s Drive eRazer Ultra is a great example of a standard wiping tool. It’s fast and reliable and can prepare a driver for reuse after getting rid of all the available data. It’s also incredibly easy to use; just look at your drive and press a few buttons and you’re all set.
The StarTech four-bay drive eraser is another great choice. You read that right; it has enough room to wipe for drives simultaneously. It also includes nine erase modes, ranging from single to multipass overwrites to quick or secure erases. It even has erasure features for SSDs, along with an easy operation panel with an LCD display.
For the more technically-minded, the StarTech also includes a nine-pin serial port; this allows you to connect it to a serial printer and print out your own erase logs for records. This tool will likely be a favorite for professional or frequent hard drive eraser pros. These tools might seem a bit costly, but it’s hard to put a price on data security.
Hands-On Methods
As mentioned before, you can always use your own hands to wipe your data permanently. Using thick gloves and eye protection is critical, as smashing your hard drive to the appropriate number of pieces will surely send debris flying.
We’d recommend combining a hammer and several nails to punch through the plates. Causing catastrophic damage in this way will make sure that the plates can never be reconstructed and any shards that remain will be irreversibly cracked or shattered. In short, it makes certain that the drive can never be repaired, and no data can ever be recovered.
To be even more thorough, smash the reading and writing heads specifically. You may want to take the drive apart with a screwdriver and smash individual components if you’re super paranoid.
The great thing about hands-on destruction is that it works just as well for both HDDs and SSDs. Hardware is hardware, and it all breaks beneath a hammer and human muscle! The only difference is that HDD’s are usually larger and their platters need to be broken into smaller pieces. SSDs are made of smaller flash storage chips; target these specifically for the best results.
Encrypting Your HDD/SSD
One last thing we’d like to touch on is encryption, specifically for SSDs. Encrypting your drive is a lot like translating your data into a different language, preferably using a complex passphrase. Using a complex passphrase makes it much more difficult for any would-be hacker to get the correct “key” to the language.
Of course, coming up with a complex passphrase is more difficult than you might think. That’s why there are utilities like VeraCrypt for Windows, or the FileVault utility included as standard for Mac computers. These tools help you encrypt your drive using a complex passphrase or algorithm, making it nigh impossible for anyone to get your data.
After this point, you can then format your drive. While the data may not be truly erased, it’s all but unreachable for anyone except you. This allows you to keep the drive and slowly rewrite the encrypted data as you fill the drive with new information.
Summary
In total, there are lots of different ways you can ensure the erasure of your data on an HDD or SSD. You can:
- Use a software deletion method, like one of the third-party tools (such as DBAN) we mentioned above or format your drive if you use a Mac
- Use a hardware tool like the StarTech
- Or use your own hands and tools to physically destroy the hard drive, shattering its components into various pieces
In any case, knowing how and when to erase your data permanently is necessary for anyone who values their privacy and data protection. It’s not enough to make sure that your safe online; you also need to guarantee that your data never ends up in the wrong hands when you recycle your hard drive or throughout your old computer.
Even apparently innocuous details like your birthday can eventually be used against you and may lead to identity theft.
Don’t take the chance and follow the above guide when the time comes to erase your hard drive!